





♥ Follow Me ♥

♥Free Fonts♥


Saturday, November 5, 2011
SUPPLIES NEEDED
TUBE OF CHOICE: I used the awesome artwork of
Keith Garvey.
This tube came with a Close Up.
You must have a license to use his art.
You can find Keith's art and get your license HERE.
SCRAPKIT: BYOK: THE BIG CHILL @ Pimp My Tags w/ Scraps
This is a bundle put together by:
Designs by Sarah
Pimp'd Designz
PolkaDot Scraps
TK Dezigns
You can find it HERE.
FONT OF CHOICE: I used Champange.
I used Photoshop for this tut.
♥♥♥♥♥♥♥
Because there are 4 different designers
I will refer to the elements like this:
sb-*** = Designs by Sarah
pd-*** = Pimp'd Designz
PDS-*** = PolkaDot Scraps
tk-*** = TK Dezigns
Let's have some fun!
Open pd-pp 01
Resize to 90%
Open pd-mask 01.
Resize to 95%.
Place this on top of your paper.
With the mask layer highlighted
hold your CTRL key down on your keyboard
and hit your mask icon in the layer palette
at the same time.
You'll see little marching ants now.
Highlight your paper layer.
Click the mask button
(this is a square with a circle in it)
at the bottom of the layer palette.
You should have two pictures in your paper layer now.
One of your paper and one of the mask.
Hide your mask layer.
Highlight the paper layer.
Right click in the layer palette.
Hit Convert to Smart Object.
Right click again.
Click Rasterize Layer.
Now you can delete the black mask layer.
Now we'll use four alphas.
Resize all of them to 25%
Place them at the bottom of the mask
so it reads SNOW.
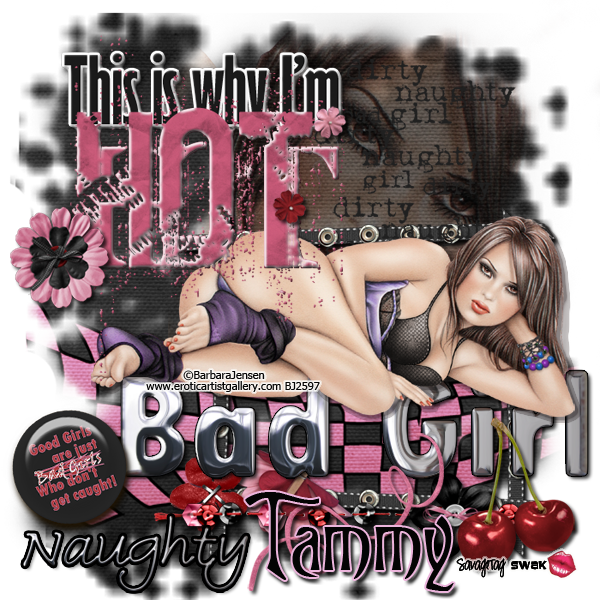
Use my tag as a guide.
Open these alphas:
PDS-S snowalpha
PDS-N snowalpha
PDS-O snowalpha
PDS-W snowalpha
Place a drop shadow on each letter.

Open tk-clusterframe4
Open your Close Up tube.
Move this behind clusterframe4 layer.
Place to your liking.
Highlight clusterframe4 layer.
Grab your Magic Eraser.
Click inside the clusterframe.
Highlight your CU tube layer.
Go to Select in your tool bar.
Click Inverse.
Hit the Delete key on your keyboard.
Go back to Select.
Click Deselect.
Now go to the upper left corner of your Layer Palette.
Click the down arrow next to the word Normal.
Click Overlay.
Open sb-splat1
Resize to 30%
Open sb-flower2
Resize to 25%
Open sb-flower1
Resize to 20%
Open your regular sized tube.
Place to your liking.
I used these elements for the rest of the taggie:
PDS-wordart2
tk-snowflake pink, resize to 30%
pd-snowflake 03, resize to 30%
PDS-snowflake1, resize to 30%
pd-snowflake 02, resize to 25%
pd-snowflake 01, resize to 25%
I placed drop shadows on all layers except:
Close Up layer
mask layer
Resize the tag to your liking.
Make a new layer.
Type your name.
I used color 265598
I also added:
Drop Shadow
Stroke: Outside, 2, color d0c4ff
MOST IMPORTANT!!
You must now do this:
Put the artist's name, website, and your license number
of the tube you used on the siggy!!
Add your name (ie: Designed by Your Name) behind this info.
Make sure this info is legible and clearly seen.
Save as PSD to maintain layers.
Then save as PNG, remembering to use a number behind your sig title.
YOU'RE DONE!!
I hope you had fun with this tut!
♥HUGS!♥
*This tut was created by me, Redneck Tuts by Savage.
Any resemblance to any other is purely coincidental.*
Artist: ©Keith Garvey www.garvgraphx.com PTE0041
Thursday, November 3, 2011
SUPPLIES NEEDED
TUBE OF CHOICE: I used the awesome artwork of
Elias Chatzoudis.
This tube came with a Close Up.
You must have a license to use his art.
You can find Elias's art and get your license HERE.
SCRAPKIT: BYOK: THE BIG CHILL @ Pimp My Tags w/ Scraps
This is a bundle put together by:
Designs by Sarah
Pimp'd Designz
PolkaDot Scraps
TK Dezigns
You can find it HERE.
FONT OF CHOICE: I used Augusta ES.
I used Photoshop for this tut.
♥♥♥♥♥♥♥
Because there are 4 different designers
I will refer to the elements like this:
sb-*** = Designs by Sarah
pd-*** = Pimp'd Designz
PDS-*** = PolkaDot Scraps
tk-*** = TK Dezigns
Let's have some fun!
Open tk-template1.
Hide the credit layer.
Open tk-snowflakepaper1.
Place this behind all template layers.
Open pd-mask 03.
Resize to 90%.
Place this on top of your paper.
With the mask layer highlighted
hold your CTRL key down on your keyboard
and hit your mask icon in the layer palette
at the same time.
You'll see little marching ants now.
Highlight your paper layer.
Click the mask button
(this is a square with a circle in it)
at the bottom of the layer palette.
You should have two pictures in your paper layer now.
One of your paper and one of the mask.
Hide your mask layer.
Highlight the paper layer.
Right click in the layer palette.
Hit Convert to Smart Object.
Right click again.
Click Rasterize Layer.
Now you can delete the gray mask layer.
We'll be doing the next step several times for different layers.
You'll see I marked the steps with *--*
When you see *Repeat these steps*
Refer back to the first instructions marked *--*.
Open sb-pp1.
Highlight the grey circle layer of the template.
*Grab your Magic Wand.
Click inside this layer.
Highlight your paper layer.
Go to Select in your tool bar.
Click Inverse.
Hit the Delete key on your keyboard.
Go back to Select.
Click Deselect.
Move your paper layer on top of your template layer.
Place a Stroke on the paper layer.*
Stroke: Outside, 3, color f998e8
Open pd-pp 01.
Highlight blue small circle layer of your template.
*Repeat these steps.*
Stroke: Outside, 3, color 8888d9
Open your Close Up tube.
Place to the upper left of the template.
You may need to resize it.
I resized mine to 80%.
Erase your tube so that only her face is visible.
Go to the upper left corner of your Layer Palette.
Click the drop down arrow next to the word Normal.
Click Screen.
Open tk-snowflakepaper3.
Resize to 50%.
Highlight the pink rounded rectangle layer.
*Repeat these steps.*
Stroke: Outside, 4, color cdc8c8
Open tk-brrrpaper.
Highlight the grey rectangle layer.
*Repeat these steps.*
Stroke: Outside, 3, color ed8bd0
Open sb-ric rac.
Flip Vertically.
Open pd-snow owl.
Resize to 35%
Open sb-pp4.
Highlight white rectangle template layer.
*Repeat these steps.*
No Stoke on this layer.
Open sb-polar bear1.
Resize to 35%
Open pd-frame 01.
Resize to 50%
Center over white rectangle template layer.
Open tk-flowerpink.
Resize to 35%
Place a Stroke on these template layers:
white thin strip: Outside, 3, color a898f9
pink thin strip: Outside, 3, color a98af8
Open PDS-paper4.
Highlight the blue thin strip template layer.
*Repeat these steps.*
Stroke: Outside, 3, color ed8bd0
Open your regular size tube.
Position where you like.
I resized mine to 75%.
I used these elements for the rest of the tag:
PDS-cluster 2
sb-polar bear2, resize to 35%
tk-snowflakepink, resize to 25%
pd-flower 01, resize to 35%
PDS-snowflake2, resize to 35%
Open sb-word art1.
Place at bottom of tag.
I added and Outer Glow.
Color: ffffbe

Resize the tag to your liking.
Place drop shadows where you wish.
Make a new layer.
Type your name.
I used color e46ab2
I also added:
Drop Shadow
Stroke: Outside, 2, color fecefd
Bevel and Emboss

MOST IMPORTANT!!
You must now do this:
Put the artist's name, website, and your license number
of the tube you used on the siggy!!
Add your name (ie: Designed by Your Name) behind this info.
Make sure this info is legible and clearly seen.
Save as PSD to maintain layers.
Then save as PNG, remembering to use a number behind your sig title.
YOU'RE DONE!!
I hope you had fun with this tut!
♥HUGS!♥
*This tut was created by me, Redneck Tuts by Savage.
Any resemblance to any other is purely coincidental.*
Artist: ©Elias Chatzoudis www.elias-designs.gr PTE0041
Tuesday, November 1, 2011
SUPPLIES NEEDED
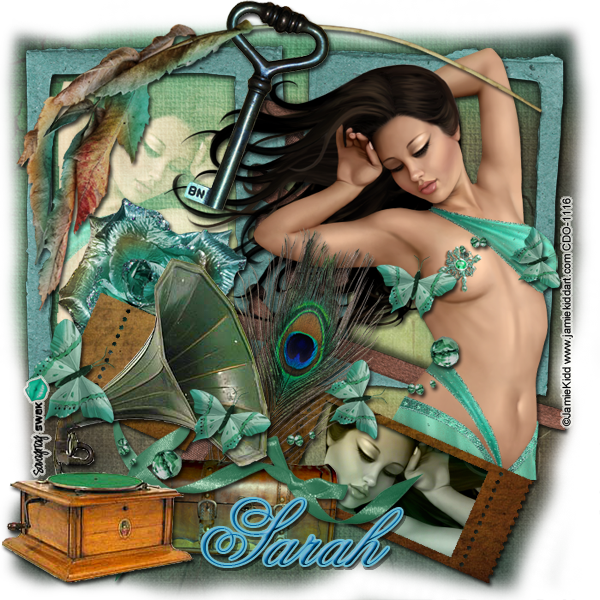
TUBE OF CHOICE: I used the awesome artwork of
Jamie Kidd.
You must have a license to use this art.
SCRAPKIT: Veridian Fantasy by Designs by Sarah
You can find it HERE.
FONT OF CHOICE: I used CenturionES.
I used Photoshop for this tut.
♥♥♥♥♥♥♥
Let's have some fun!
Open a new canvas, 700x700.
Transparent background.
Use my taggie as a guide for placement of elements.
Open pp1.
Center on canvas.
Grab a soft edged eraser.
Erase around the edges.
Open frame1.
Place in upper half of canvas.
Open your tube.
Place to your liking.
Duplicate this layer twice.
Hide one duplicated layer.
Move the visible duplicated tube layer under frame1 layer.
Place inside left side of frame1.
Position to your liking.
I flipped mine Horizontally.
Go to upper left corner of your Layer Palette.
Click the down arrow next to the word Normal.
Choose Screen.
Highlight frame1 layer.
Grab your Magic Wand.
Click inside the frame where your duplicated tube is.
Highlight your duplicated tube layer.
Go to Select in your tool bar.
Click Inverse.
Hit the Delete key on your keyboard.
Go back to Select.
Click Deselect.
Open pp2.
Open frame4.
With frame4 layer highlighted,
Grab your Magic Wand.
Click on the frame.
Highlight pp2 layer.
Go to Select.
Click Inverse.
Hit Delete on your keyboard.
Back to Select.
Click Deselect.
Right Click in your Layer Palette.
Click Merge Down.
I used these elements:
flower1, resize to 50%
feather, resize to 750%
trunk, resize to 50%
bow1, resize to 80%
gramophone1, flip Horizontally
beads2
branch2, resize to 95%
Now go grab the tube you hid earlier.
Move it beneath frame4.
Unhide it.
Place it inside the frame to your liking.
With the tube layer highlighted,
Go to the upper left corner of your Layer Palette.
Click the down arrow.
Choose Luminosity.
Leave Opacity at 100%.
Highlight frame4 layer.
Grab the Magic Wand.
Click inside the frame.
Highlight your tube layer.
Go to Select.
Click Inverse.
Hit Delete on your keyboard.
Back to Select.
Click Deselect.
Place a drop shadow on your layers except:
paper layer
duplicated tube layers
Resize your taggie to your liking.
Make a new layer.
Type your name.
I used color: 0268a6
Stroke, Outside, 2, color 6dbbce
I also used a drop shadow and
Bevel & Emboss
Outer Glow
BEVEL & EMBOSS

OUTER GLOW

Use the settings above.
Click Ok.
MOST IMPORTANT!!
You must now do this:
Put the artist's name, website, and your license number
of the tube you used on the siggy!!
Add your name (ie: Designed by Your Name) behind this info.
Make sure this info is legible and clearly seen.
Save as PSD to maintain layers.
Then save as PNG, remembering to use a number behind your sig title.
YOU'RE DONE!!
I hope you had fun with this tut!
♥HUGS!♥
*This tut was created by me, Redneck Tuts by Savage.
Any resemblance to any other is purely coincidental.*
Artist: ©Jamie Kidd www.jamiekiddart.com CDO-1116
Subscribe to:
Posts
(Atom)
About Me
- Savage
- Hi Ya'll! I'm Savage and I'd like to welcome you to Redneck Tuts. These are not your ordinary tuts, as they are geared toward those of us that don't have "working knowledge" of Photoshop or PSP. My tuts are all done in PS. They are designed to show you different techniques that you may not know. I hope you learn something that you can use in your creations in the future. Please, just have fun and put your own spin on these tuts. Be original and shine! Love Ya! ♥


