


♥ Follow Me ♥

♥Free Fonts♥


Wednesday, February 29, 2012
SUPPLIES NEEDED
TUBE OF CHOICE: I used an Exclusive Jose Cano tube.
It was a bonus tube with purchase
for a limited time.
It came with a Close Up layer.
You must have a license to use this art.
You can find this art and get your license HERE.
SCRAPKIT: Punkette by Black Widow Creationz.
You can find it HERE.
FONT OF CHOICE: I used Chigger.
I used Photoshop for this tut.
♥♥♥♥♥♥♥
Open a canvas 700x700 pixels.
Transparent background.
Open PP10.
Center on canvas.
Grab a soft edged eraser.
Erase around the edges.
Open EL31.
Center.
Open EL29.
Place directly on top of EL31.
Resize to 90%.
Open EL30.
Place directly on top of EL31.
Resize to 80%.
Open PP7.
Center on canvas.
Move behind all frame layers.
Highlight EL30 layer.
Grab your Magic Wand.
Click inside the frame.
Highlight PP7 layer.
Go to Select in your tool bar.
Click Inverse.
Hit the Delete key on your keyboard.
Go back to Select.
Choose Deselect.
Use my tag as a guide for placement
of these elements.
I used these:
EL20
EL16, resize to 35%
EL34
EL11, resize to 50%
Open your regular sized tube.
Place to your liking.
Continue with these elements:
EL45, resize to 45%
Flip this 90 degrees Counter Clockwise(CCW)
EL39, resize to 40%
EL21, resize to 35%
EL37, resize to 80%
Duplicate this and flip Horizontally.
EL13
EL36, resize to 25%
EL2, resize to 45%
EL35, resize to 50%
EL33, resize to 35%
Duplicate this layer.
Open your Close Up tube.
Place this behind EL30 layer.
(Your purple frame)
Center inside to your liking.
I flipped mine Horizontally.
Highlight EL30 layer.
Grab your Magic Wand.
Click inside the frame.
Highlight your CU tube layer.
Go to Select in your tool bar.
Click Inverse.
Hit the Delete key on your keyboard.
Go back to Select.
Click Deselect.
With your CU tube layer still highlighted,
Go to the upper left corner of the Layer Palette.
Click the drop down arrow next to the word Normal.
When the menu appears,
Click Luminosity.
Leave the Opacity set at 100%.
Place a drop shadow on all layers except:
paper layers
Close Up tube
Resize your siggy to your liking.
Make a new layer.
Type your name.
I used color ff67d4
I didn't use any effects on the name.
MOST IMPORTANT!!
You must now do this:
Put the artist's name, website, and your license number
of the tube you used on the siggy!!
Add your name (ie: Designed by Your Name) behind this info.
Make sure this info is legible and clearly seen.
Save as PNG.
YOU'RE DONE!!
(If you want to maintain your layers
Always Save as PSD first.
Then you can save it as a PNG.
When doing both these steps
It is important to change the title of the tag.
Example:
When I Save as PSD,
I always name the tag what I want.
Then, when saving as a PNG,
I add the number 1 behind the name of the tag.
Like this:
Sweetly Toxic, Save as PSD
Sweetly Toxic1, Save as PNG
Otherwise, your PNG will overwrite your PSD
Merging your tag into one layer only.)
YOU'RE DONE!
I hope you had fun with this tut!
♥HUGS!♥
*This tut was created by me, Redneck Tuts by Savage.
Any resemblance to any other is purely coincidental.*
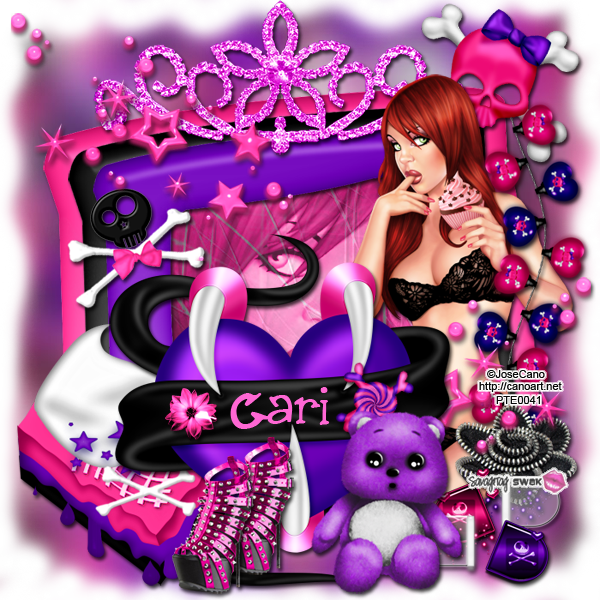
Artist: ©Jose Cano http://canoart.net PTE0041

SUPPLIES NEEDED
TUBE OF CHOICE: I used the awesome artwork of
Jose Cano.
The tube I used came with 2 Close Ups.
When I mad this tut, Jose was selling at a different store.
That store has now closed.
When I mad this tut, Jose was selling at a different store.
That store has now closed.
SCRAPKIT: Revenge by Jenny's Designz.
You can find it HERE.
MASK: Mask3 by Savage SWAK.
You can snag it HERE.
FONT OF CHOICE: I used ConsulScriptSSK.
I used Photoshop for this tut.
♥♥♥♥♥♥♥
Let's have some fun!
Open a new canvas, 700x700.
Transparent background.
Use my taggie as a guide for placement of elements.
Open paper5.
Resize to fit your canvas.
Center on canvas.
Open Mask3.
You'll see three layers in Mask1.
Only move the layer called Mask
onto your siggy.
Place this on top of your paper.
With this layer highlighted
hold your CTRL key down on your keyboard
and hit your mask icon in the layer palette
at the same time.
You'll see little marching ants now.
Highlight your paper layer.
Click the mask button
(this is a square with a circle in it)
at the bottom of the layer palette.
*You should have two pictures in your paper layer now.
One of your paper and one of the mask.*
Hide your mask layer.
Highlight the paper layer.
Right click in the layer palette.
Hit Convert to Smart Object.
Right click again.
Click Rasterize Layer.
Now you can delete the gray mask layer.
Resize your new mask to your liking.
Open frame6.
Center on canvas.
Open your largest Close Up tube.
Move your CU tube under frame6
but on top of mask.
Duplicate this layer.
Flip the duplicate Horizontally.
Place these tube layers inside
the left and right parts of frame6.
When you have them as you like,
Highlight frame6 layer.
Grab your Magic Wand.
Click inside the left frame.
Now highlight that tube layer.
Go to Select in the tool bar.
Click Inverse.
Hit the Delete key on your keyboard.
Go back to Select.
Choose Deselect.
Go to the upper left corner of your Layer Palette.
Click the drop down arrow next to the word Normal.
Choose Overlay.
Leave the Opacity set to 100%.
Highlight your frame layer again.
With your Magic Wand,
Click inside the right frame.
Highlight that tube layer.
Go to Select.
Inverse.
Hit Delete on the keyboard.
Back to Select.
Click Deselect.
Go to the drop down arrow again.
Click Overlay.
Opacity 100%.
Open the next sized Close Up tube.
This should be right under frame6 layer
but on top of the tube layers you just worked with.
Place this layer inside the center frame to your liking.
Highlight frame6 layer.
Grab your magic wand.
Click inside the center frame.
Highlight that tube layer.
Go to the toolbar at the top of your screen.
Click Select.
In the drop down menu,
Choose Inverse.
Now hit the Delete key on your keyboard.
Go back to Select.
Click Deselect.
With your tube layer still highlighted,
Go to the drop down arrow again
in the upper left corner of the Layer Palette.
Click the arrow.
Select Multiply.
Leave Opacity set at 100%.
On to the elements.
These are the ones I used.
Use my tag as a guide for placement.
chain1, resize to 35%
banner, resize to 65%
flower5, resize to 80%
Flip Vertically
Duplicate this layer.
braclet, resize to 75%
flower4, resize to 45%
Duplicate this layer.
doodle, resize to 20%
flower1, resize to 35%
Duplicate this layer twice.
shoes, resize to 35%
bag, resize to 35%
ribbon, resize to 65%
Duplicate this layer
Flip Horizontally.
rose, resize to 25%
Duplicate this layer three times.
Rotate each layer to fit where you like.
I erased the stems off the ones
at the top of the frame.
Open your regular sized tube
and place to your liking.
Open wordart1.
Resize to 75%.
I used these effects on this:
Color Overlay, Black
Stroke, Center, 2, color fec5e8
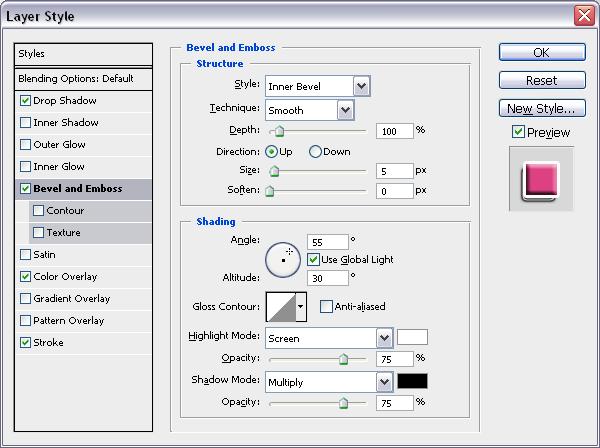
Bevel & Emboss
_html_3cb1ddd9.jpg)
Outer Glow

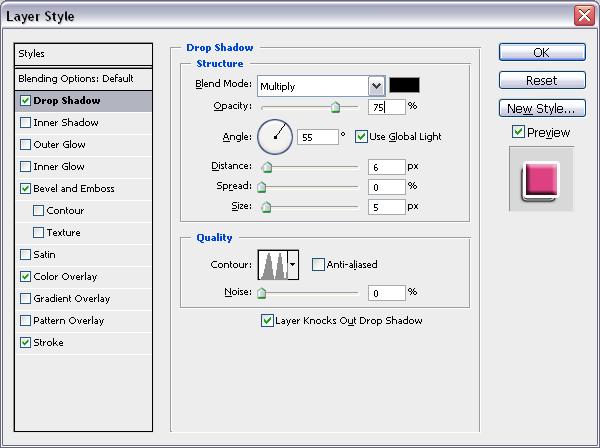
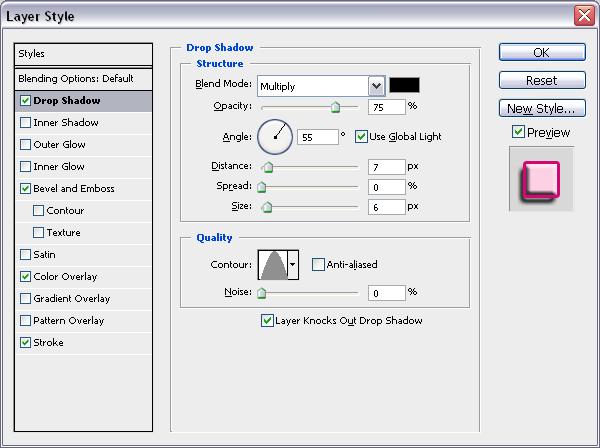
Drop Shadow

Place a drop shadow on your layers.
I did not place a drop shadow on:
the Close Up tube layers.
Resize your taggie to your liking.
Make a new layer.
Type your name.
I used color f319a9.
Stroke: Center, 2, Black
I also used the same settings as above for:
Bevel & Emboss
Outer Glow
Drop Shadow
MOST IMPORTANT!!
You must now do this:
Put the artist's name, website, and your license number
of the tube you used on the siggy!!
Add your name (ie: Designed by Your Name) behind this info.
Make sure this info is legible and clearly seen.
Save as PSD to maintain layers.
Then save as PNG, remembering to use a number behind your sig title.
YOU'RE DONE!!
I hope you had fun with this tut!
♥HUGS!♥
*This tut was created by me, Redneck Tuts by Savage.
Any resemblance to any other is purely coincidental.*
Artist: ©Jose Cano www.canoart.net PTE0041
Sunday, February 26, 2012
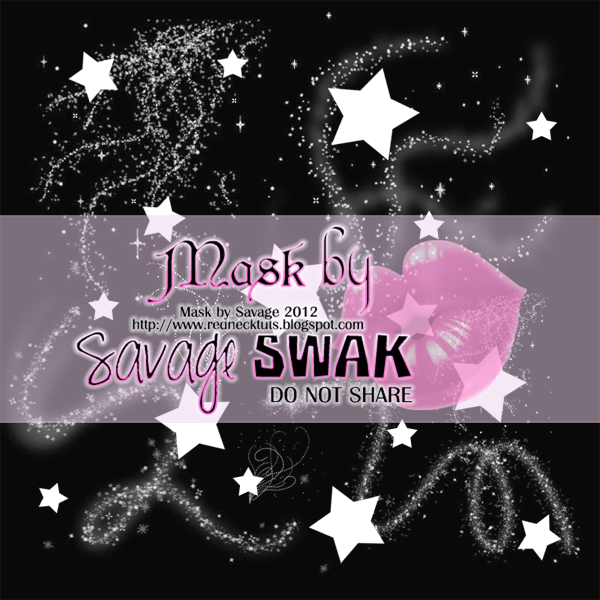
Yet another multi-layered mask.
Stars are one layer,
glitter trails are another.
This is saved as a psd file in layers.
It is also saved as jpeg with the layers combined into one.
Use just one layer or both!
Have Fun!
♥Please leave some love if you download.♥

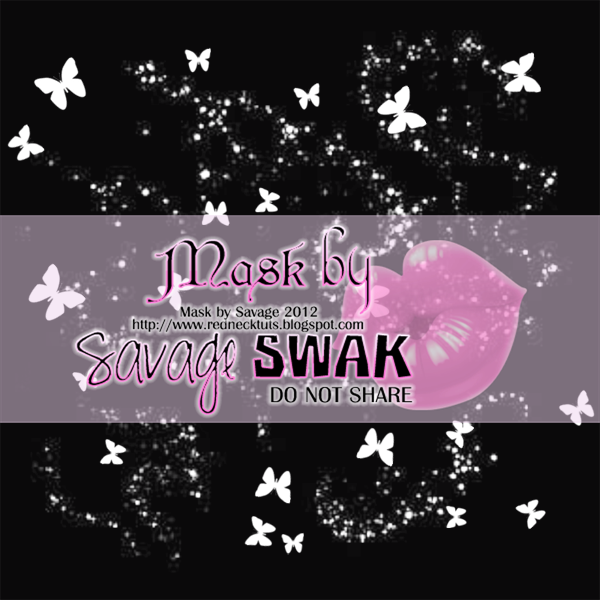
Here's another multi-layer mask for you!
The butterflies are one layer,
and the sparklies are another layer.
You can just one mask or both!
This is saved as psd in layers
and as a jpeg file that combines both layers into one.
Hope you likey!
♥Please leave some love if you download.♥
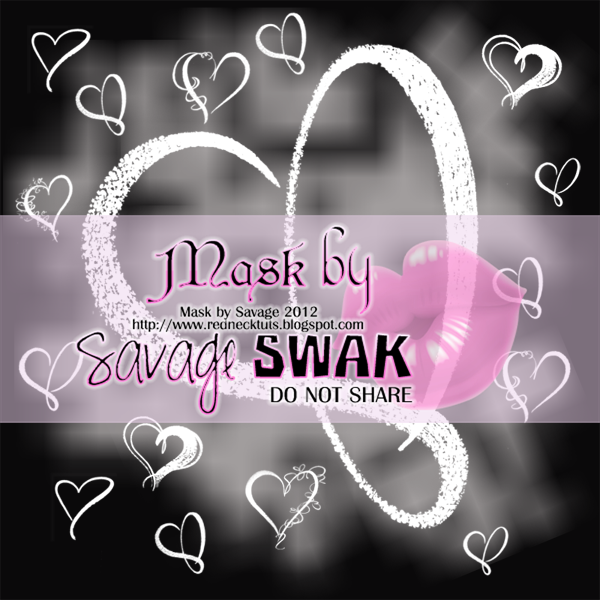
Here's another multi-layer mask for you!
The hearts are one layer,
and then you have the background mask layer.
You can just one mask or both!
This is saved as psd in layers
and as a jpeg file that combines both layers into one.
Hope you likey!
Have fun!
Recoloring is changing the color of something
you are working on.
It's fun and makes your creation unique to you.
Just make sure to read any TOU
to see if recoloring is allowed before you start.
Some kit designers allow this,
some do not.
Same with tube artists, some do, some don't.
Read the TOU to make sure.
Using color or gradient overlays is probably
the easiest way of changing the color of things.
When using this effect,
play around with different colors and blend modes.
You will get different results when you use
color/gradient overlays using
soft light, screen, normal, pin light, etc...
Also adjusting the percentage will effect the outcome.
Color/gradient overlay is found in your tool bar.
Click Layer.
Then click Layer Style.
Choose either Color or Gradient Overlay.
Another way to recolor something is to work with
Hue/Saturation.
This is found in your tool bar under Image
then Adjustments.
Make sure before you start playing
that you check the box in the lower right corner
that says Preview.
This will allow you to see the changes as you make them.
Play around sliding the bars from left to right.
You will be able to see the color change
on your work space as you play.
If you find the color isn't changing,
you will need to check the box in the lower right corner
of the Hue/Saturation box
that says Colorize.
Play around with these recoloring techniques
until you get the color you want.
Have Fun!
♥HUGGERS♥
Word Art is FUN!
I love using word art in my creations.
Sometimes you have this taggie in mind
but you just can't figure out what text to put on it.
Word art comes in handy when that happens.
Normally, word art designers have more than one
word art in the download.
These will often be on separate layers.
If they aren't,
you'll need to crop each word art out and save it individually.
You can dress up word art to fit your tag.
Recolor it, stick a Stroke on it,
add a drop shadow or bevel & emboss.
If you can imagine it,
you can do it to word art.
That's what makes it so much fun!
♥HUGGERS♥
Always remember to read the TOU included with Word Art.
For those of you who are not familiar with using templates,
I'll try to explain them so you can enjoy them
in your creations.
Templates are made up of layers.
Each layer is labeled so you don't have to guess what it is.
There is also a layer where the designer will have their info on it.
You can delete this layer or just hide it.
I normally just hide it.
That way, I know who made it and I can go back
to their site to snag more goodies!
When you download a template,
it will come with TOUs, Terms of Use.
Please read the TOU before using the template.
There's important information in there that the designer wants you to know.
For example, some designers allow you to remove layers.
Others don't.
So read the TOU so see what you can and can't do with it.
Designers spend a lot of time on templates.
So please respect them by reading the TOU.
When you first look at a template with all its layers
it can be a bit overwhelming.
Just take it one step at a time.
Look at the temp in your work space.
Normally, an idea for what you want to do with it will surface.
I often use scrap kits to decorate a template.
But you don't have to use a kit.
You can use plug ins, special effects, filters, etc...
Work on one layer at a time.
Pick a layer as your starting point and work with that layer only.
When you have the layer the way you want,
move on to the next layer.
Sometimes you'll be going along and look at a previous layer
you've worked on and think, "Nah, not working now."
That's ok!
Just go back to that layer and change it!
I like to use elements from kits to enhance the tube I've chosen.
I also like to use papers that come with the kit for added texture.
You can recolor a template to fit whatever theme or color
you are working with.
Have some fun playing around!
Try using different effects:
gradient/color overlay, drop shadow, stroke, bevel & emboss
There's all kinds of effects you can use to make your creation.
Some templates come with Word Art.
Put your own spin on this with text effects.
If you're into sparklies
You can always add Noise.
Most generally, you can move the Word Art around.
So if it interferes with your creation,
just move it to a different place on the temp!
If you look at a template as a color book,
it may be easier for you to work with.
Remember, one layer at a time.
Have fun and get Creative!
♥HUGGERS!♥
Saturday, February 25, 2012
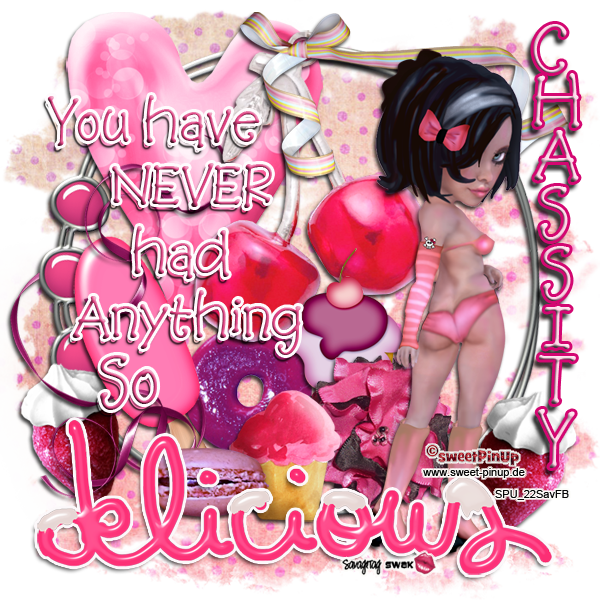
SUPPLIES NEEDED
TUBE OF CHOICE: I used the sweet and sexy artwork of
Sweet Pinup.
You must have a license to use this art.
You can find this tube and get a license HERE.
SCRAPKIT: Candied by PolkaDot Scraps.
You can find it HERE.
MASK: Mask14 by Savage SWAK.
You can snag it HERE.
FONT OF CHOICE: I used BaaBook HMK.
I used Photoshop for this tut.
♥♥♥♥♥♥♥
Let's have some fun!
Open a new canvas, 700x700.
Transparent background.
Use my taggie as a guide for placement of elements.
Open paper2.
Center on canvas.
Resize to 90%
Open Mask14.
You'll see three layers in Mask14.
Only move the layer called Mask
onto your siggy.
Place this on top of your paper.
With this layer highlighted
hold your CTRL key down on your keyboard
and hit your mask icon in the layer palette
at the same time.
You'll see little marching ants now.
Highlight your paper layer.
Click the mask button
(this is a square with a circle in it)
at the bottom of the layer palette.
*You should have two pictures in your paper layer now.
One of your paper and one of the mask.*
Hide your mask layer.
Highlight the paper layer.
Right click in the layer palette.
Hit Convert to Smart Object.
Right click again.
Click Rasterize Layer.
Now you can delete the gray mask layer.
Resize your new mask to your liking.
I used these elements:
frame4
heart1
strawberry, resize to 45%
Duplicate this layer.
Flip Horizontally.
button, resize to 50%
popscicle, resize to 50%
ribbon4
I erased a little bit of ribbon4
that covered frame4.
Charm
icecream, resize to 40%
flower3, resize to 65%
cupcake, resize to 40%
cookie, resize to 35%
ribbon6, resize to 65%
Flip this Horizontally and Vertically.
Open your tube.
You may have to resize your tube.
I resized mine to 30%.
Place to your liking.
Open wa.
I placed a Stroke on this.
Outside, 3, White.
Place a drop shadow on all layers
except the mask/paper layer.
Resize your taggie to your liking.
Now we'll work on the word art.
I ended up with five layers.
This way, I can place the words where I like.
Use my tag as a guide for the text.
Type the words you wish to use.
*When you have the text the way you want,
Right click on the top layer of text
in the Layer Palette.
When the menu pops up,
Click on Rasterize Type.
Do this for each layer.
Go back to the top layer of text.
Right click again.
This time click Merge Down.
Do this for each text layer
until all five layers are merged into one.*
(We will repeat the steps marked * for your name.)
Now for your name.
You will need one layer for each letter
in your name.
Position the letters underneath each other.
Use my tag as a guide.
Repeat the steps above marked with *.
Ok. Now we'll do the text effects.
For these, go to Layer in your tool bar.
Then go to Layer Style.
For the word art:
Color Overlay, color de4181
Stroke, Outside, 3, White
Bevel & Emboss
Drop Shadow
For Your Name:
Color Overlay, color fdd1e3
Stroke, Outside, 3, color d30771
Same settings for Bevel & Emboss as above.
Drop Shadow
MOST IMPORTANT!!
You must now do this:
Put the artist's name, website, and your license number
of the tube you used on the siggy!!
Add your name (ie: Designed by Your Name) behind this info.
Make sure this info is legible and clearly seen.
Save as PSD to maintain layers.
Then save as PNG, remembering to use a number behind your sig title.
YOU'RE DONE!!
I hope you had fun with this tut!
♥HUGS!♥
*This tut was created by me, Redneck Tuts by Savage.
Any resemblance to any other is purely coincidental.*
Artist: ©Sweet Pinup www.sweet-pinup.de SPU-22SavFB
Subscribe to:
Posts
(Atom)
About Me

- Savage
- Hi Ya'll! I'm Savage and I'd like to welcome you to Redneck Tuts. These are not your ordinary tuts, as they are geared toward those of us that don't have "working knowledge" of Photoshop or PSP. My tuts are all done in PS. They are designed to show you different techniques that you may not know. I hope you learn something that you can use in your creations in the future. Please, just have fun and put your own spin on these tuts. Be original and shine! Love Ya! ♥


