






♥ Follow Me ♥

♥Free Fonts♥


Wednesday, July 13, 2011
SUPPLIES NEEDED
TUBE OF CHOICE: I used the awesome artwork of
Barbara Jensen.
The tube I used came with a Close Up.
You must have a license to use this art.
You can find Barbara's art and get a license HERE.
SCRAPKIT: So Hot Collab.
This is 3 PTU kits combined in one bundle.
Designers are:
Cora's Creations
Designs by Sarah
TammyKat Designs
You can find it HERE.
MASK: Mask1 by Savage SWAK.
You can snag it HERE.
FONT OF CHOICE: I used Trinigan FG.
I used Photoshop for this tut.
♥♥♥♥♥♥♥
Because we're using 3 different kits,
I will refer to the elements like this:
cc-*** = Cora's Creations kit
sb-*** = Designs by Sarah kit
tk-*** = TK Dezigns kit
Let's have some fun!
Open a new canvas, 700x700.
Transparent background.
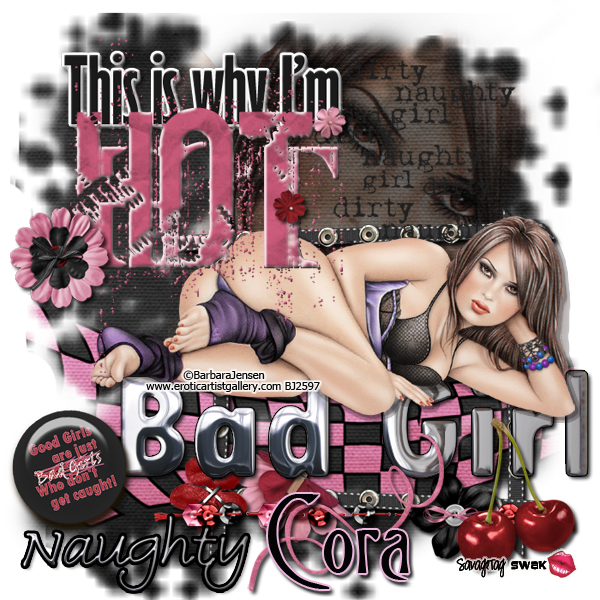
Use my taggie as a guide for placement of elements.
Open cc-paper12.
Center on canvas.
Open Mask1.
You'll see two layers in Mask1.
Only move the layer called Mask
onto your siggy.
Place this on top of your paper.
With this layer highlighted
hold your CTRL key down on your keyboard
and hit your mask icon in the layer palette
at the same time.
You'll see little marching ants now.
Highlight your paper layer.
Click the mask button
(this is a square with a circle in it)
at the bottom of the layer palette.
*You should have two pictures in your paper layer now.
One of your paper and one of the mask.*
Hide your mask layer.
Highlight the paper layer.
Right click in the layer palette.
Hit Convert to Smart Object.
Right click again.
Click Rasterize Layer.
Voila! You have a mask!
Now you can delete the gray mask layer.
Enlarge your new mask to your liking.
Open tk-ribbonframe-shadow.
Place in lower right corner.
Along the bottom of the frame
I used these elements:
sb-flower3, resize to 50%
tk-redflower, resize to 35%
tk-sequinstitches-red
sb-flower4, resize to 25%
Open cc-wa 03, resize to 35%.
Place this over to the bottom left.
Make sure to leave room for your name.
Open sb-wordart2.
Resize to 75%.
Place this in upper right corner.
Use my tag for guidance in placing.
Open cc-wa 02.
Open cc-flair01, resize 50%.
Open sb-swirl2, resize 35%.
Open cc-cherries, resize 50%.
Open your tube.
Place where you like.
Open tk-thisiswhyimhot.
Place in upper left corner.
Open sb-flower2.
Resize to 35%.
Rotate a little so both flowers overlap wordart.
Open cc-flower 02, resize 35%.
Now for your Close Up tube.
Place your close up behind your frame layer
but on top of your mask layer.
Position this how you like.
You can use my tag as a guide.
With this layer highlighted
Go to the upper left corner of the layer palette.
Where you see the word Normal,
there is a drop down arrow next to it.
Click the arrow.
Choose Soft Light.
Leave the Opacity at 100%.
(That's in the upper right corner of the layer palette.)
Ok. Now grab a soft edged eraser.
Erase your Close Up tube where it
extends outside the mask.
Place a drop shadow on your layers.
I did not place a drop shadow on
the mask, sb-wordart2 or Close Up tube layers.
On cc-wa layers,
I placed a drop shadow and stroke.
For tk's thisiswhyimhot wordart,
I used Bevel & Emboss
and Inner Glow.
These are the settings I used:
Bevel & Emboss

Click Ok.
Here's the Inner Glow settings:

Click Ok.
Resize your taggie to your liking.
Make a new layer.
Type your name.
I used Black.
Stroke, Outside, 2, color ecb5dc.
I also used a drop shadow.
MOST IMPORTANT!!
You must now do this:
Put the artist's name, website, and your license number
of the tube you used on the siggy!!
Add your name (ie: Designed by Your Name) behind this info.
Make sure this info is legible and clearly seen.
Save as PSD to maintain layers.
Then save as PNG, remembering to use a number behind your sig title.
YOU'RE DONE!!
I hope you had fun with this tut!
♥HUGS!♥
*This tut was created by me, Redneck Tuts by Savage.
Any resemblance to any other is purely coincidental.*
Artist: ©Barbara Jensen www.eroticartistgallery.com BJ2597
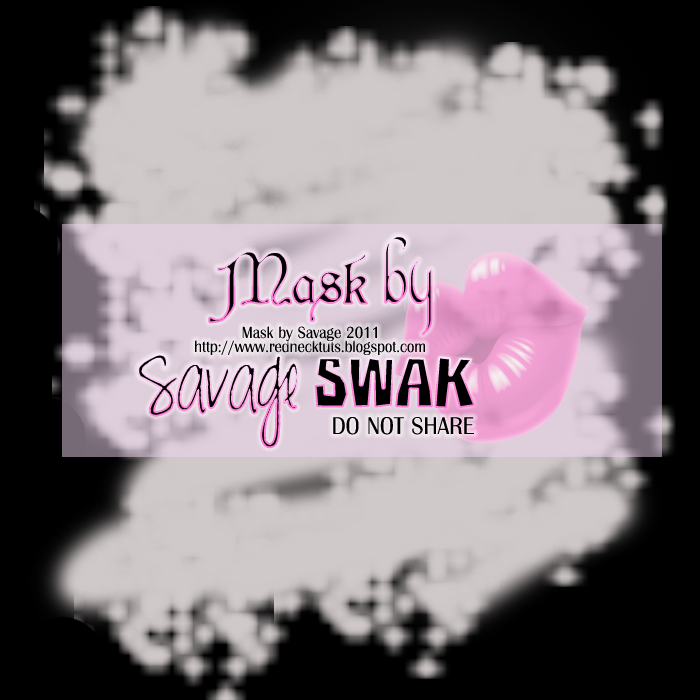
I decided to play around with Masks.
All masks that I make will be in psd and jpeg formats.
The psd's are in layers.
If you don't know how to work with masks in Photoshop
Take a look HERE.
I hope you enjoy playing!
♥HUGGERS!♥

It can be tricky using masks in Photoshop.
I've tried many ways with many masks.
I always have to get rid of the black part
which can be very time consuming and tricky.
So I've decided to make masks
that will work easily in PS.
I save my masks as psd
and jpeg for those who don't use PS.
When using my masks
you'll find three layers:
my credits
the mask
background
When you open one of my masks,
go ahead and hide the credit layer right away.
The background layer is only there so you can see the mask clearly.
You can hide that layer if you want.
The mask layer is the only one you'll be playing with.
It's easy. LOL!
Here we go!
Open your mask.
Move only the mask layer of my masks onto your canvas.
Place it on top of your paper/photo.
Make sure your mask layer is highlighted.
While holding down the CTRL button on your keyboard,
Click the mask icon on your mask layer.
You should have little marching ants around your mask now.
Highlight your paper/photo layer.
Now look down at the bottom of your layer palette.
You'll see a little mask button.
(It's a square with a circle in it.)
Click that mask button.
Now hide your original mask layer.
Viola! You have a new mask!
These next steps are optional
but they do help in building the rest of your taggie.
With the new mask layer highlighted:
Right click in the layer palette.
Click on Convert to Smart Object.
Right click again.
Click on Rasterize layer.
You can now delete the original mask layer.
I hope you found this helpful.
Have fun playing!
♥HUGGERS!♥
**UPDATE**
Thanks to Jackie's Jewels
I now know how to use a PSP jpeg mask in Photoshop.
With her permission,
I am sharing this with you.
Follow the above steps
BUT!
When you highlight your mask,
Go to Channels in the top of your Layer Palette.
Hold down the CTRL key on your keyboard and click RGB.
Go back to Layers.
Highlight your paper layer.
Hide your mask layer.
Now click the mask button (the square with a circle in it)
at the bottom of the Layer Palette.
And....YAY!!
There you have it!
Thank you, Jackie, for sharing this with us.
You can find Jackie's fabulous creations
over at her blog:
Jackie's Jewels
Hope you find this helpful.
I know I did.
Thanks again, Jackie!
♥♥HUGGERS♥♥
Subscribe to:
Posts
(Atom)
About Me
- Savage
- Hi Ya'll! I'm Savage and I'd like to welcome you to Redneck Tuts. These are not your ordinary tuts, as they are geared toward those of us that don't have "working knowledge" of Photoshop or PSP. My tuts are all done in PS. They are designed to show you different techniques that you may not know. I hope you learn something that you can use in your creations in the future. Please, just have fun and put your own spin on these tuts. Be original and shine! Love Ya! ♥


