






♥ Follow Me ♥

♥Free Fonts♥


Monday, May 7, 2012
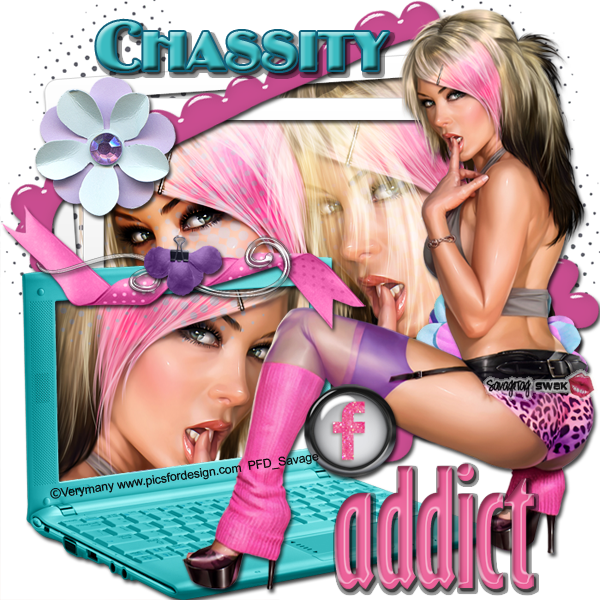
SUPPLIES
NEEDED
TUBE
OF CHOICE: I used the
awesome artwork of
Verymany
found at Pics For Design.
This tube
came with a Close Up.
You must have
a license to use this art.
You
can find this art and get your license HERE.
SCRAPKIT:
Tech Savvy Collab.
This is a set
of five kits (PTU).
The designers
include:
Designs by
Sarah
Pimp'd
Designz
PolkaDot
Scraps
Schnegge's
Scraps
TK Dezigns
You
can find it HERE.
FONT
OF CHOICE: I used
BinnerSCD.
I
used Photoshop for this tut.
♥♥♥♥♥♥♥
Because
we're using 5 different kits,
I
will refer to the elements like this:
sb-***
= Designs by Sarah kit
pd-***
= Pimp'd Designz kit
PDS-***
= PolkaDot Scraps kit
schn-***=Schnegge's
Scraps
tk-***
= TK Dezigns kit
Open a
canvas, 700x700 pixels.
Open
pd-print02.
Resize to 75%
Place in
upper left corner of canvas.
Duplicate
this layer.
Flip
Horizontally.
Place in
upper right corner of canvas.
Open
sb-frame1.
Center.
Open
PDS-frame3.
Rotate this
slightly.
Place over
sb-frame1.
Open and
place these elements:
sb-flower1
schn-flower03
PDS-laptop
Highlight
your PDS-laptop layer.
Grab your
Magic Wand.
Click inside
the laptop screen.
Highlight
sb-frame1 layer.
Go to Edit in
your tool bar.
Click Cut.
Highlight the
laptop layer again.
Grab the
Magic Wand.
Click inside
the laptop screen.
Highlight
PDS-frame3.
Go to Edit.
Click Cut.
Now we'll
work with the tubes.
Open your
close up tube.
Place this
behind sb-frame1
and on top of
pd-print02.
Move over to
the inside left of sb-frame1.
Use my tag as
a guide for placement.
Duplicate
this layer twice.
Hide layers 2
& 3 for now.
With your
first CU tube layer highlighted,
Grab an
eraser.
Erase all of
the tube layer that goes outside
the inside
part of sb-frame1.
Go to the
upper left corner of your Layer Palette.
Click the
down arrow next to the word Normal.
In the drop
down menu,
Click
Luminosity.
Leave Opacity
set at 100%.
Duplicate
this layer.
With the
duplicated layer highlighted,
Go to the
down arrow again.
This time, in
the drop down menu,
Click Soft
Light.
Opacity: 100%
Open your
regular size tube.
Place this on
top of PDS-laptop.
You may need
to resize your tube.
I resized
mine to 85%.
Position
where you like.
Back to the
CU tube layers.
Highlight the
second CU layer.
Place this to
the right inside of sb-frame1.
This will
overlap the CU tube layer
you just did.
Position to
your liking.
Grab an
eraser.
Erase all
parts of this tube that go
outside the
outer part of sb-frame1.
Go to the
down arrow in your Layer Palette.
In the drop
down menu,
Click Screen.
Opacity: 100%
Highlight
your third CU tube layer.
Position this
inside the laptop screen.
I flipped
this layer Horizontally.
When you have
this layer
positioned
where you like,
Highlight the
laptop layer in the Layer Palette.
Grab your
Magic Wand.
Click inside
the laptop screen.
Highlight
your CU tube layer.
Go to Select
in your tool bar.
Click
Inverse.
Hit the
Delete key on your keyboard.
Go back to
Select.
Click
Deselect.
Go to the
down arrow in your Layer Palette.
In the drop
down menu,
Click
Luminosity.
Leave Opacity
at 100%.
Finish your
tag with these elements:
sb-ribbon2,
resize to 65%
pd-swirl,
resize to 50%
schn-flowerclip,
resize to 40%
tk-element13
sb-facebook
icon
Place a drop
shadow on all layers except:
CU tube
layers
pd-print02
layers
Resize the
tag to your liking.
Make a new
layer.
Type your
name on the taggie.
I used color
3cbcc2.
I used:
Stroke,
Outside, 2, color 11627c
Drop Shadow
Bevel &
Emboss

MOST
IMPORTANT!!
You must now
do this:
Put the
artist's name, website, and your license number
of the tube
you used on the siggy!!
Add your name
(ie: Designed by Your Name) behind this info.
Make sure
this info is legible and clearly seen.
Save as PSD,
then PNG.
YOU'RE DONE!!
I hope you
had fun with this tut
and that you
can use this technique
in other
taggies you create!
HUGS!
*This tut was
created by me, Redneck Tuts by Savage.
Any
resemblance to any other is purely coincidental.*
Artist:
©Verymany www.picsfordesign.com
PFD_Savage
Tuesday, April 10, 2012
Often times when creating a tag
you will need to resize elements or tubes
to fit your creation.
You will first need to read the TOU
of the designer or artist to see if this is allowed.
Almost always, enlarging is a big no no.
You can reduce the size to fit your tag
but you cannot make it bigger.
Let's say you have a flower that is way too big for your tag.
You need to reduce its size.
With the flower layer highlighted in the Layer Palette,
Go up to your tool bar.
Look for the words:
Show Transform Controls
Check the little box next to it.
Now you'll see little squares around your flower in the work space.
In the center of that square is a tiny circle.
That marks the center of your flower.
I use that as a guide in resizing.
Left Click one of the squares or the circle.
Now you'll see your flower outlined in a square or rectangle.
Look up in your tool bar again.
You'll see its changed.
The X is the height in pixels.
The Y is the width.
These are the original dimensions of the flower.
Next to this, you'll see:
W 100%
H 100%
The 100% will be in a box.
These are what you will be changing.
Type in a different number where 100% is.
Make sure both the W and H numbers are the same.
This keeps the flower in proportion.
You may want to try different sizes
before deciding which size looks good.
I normally start with 75 and work down in numbers.
(You don't need to put the % sign in there.
It will do that automatically.)
When you get the size you want,
Hit Enter on your keyboard.
Now you'll need to click the arrow in your left tool bar.
(It should be the very top icon.)
A window will pop up.
There will be 3 options:
Apply
Cancel
Don't Apply
Clicking Apply will lock in your changes.
Cancel will allow you to go back and make more changes.
Don't Apply will make the flower its original size.
If you like your changes,
Click Apply.
You just resized your flower!
Use these steps whenever you need to resize
elements or tubes.
Just make sure to check those TOUs first.
Hope this helps!
♥HUGGERS♥
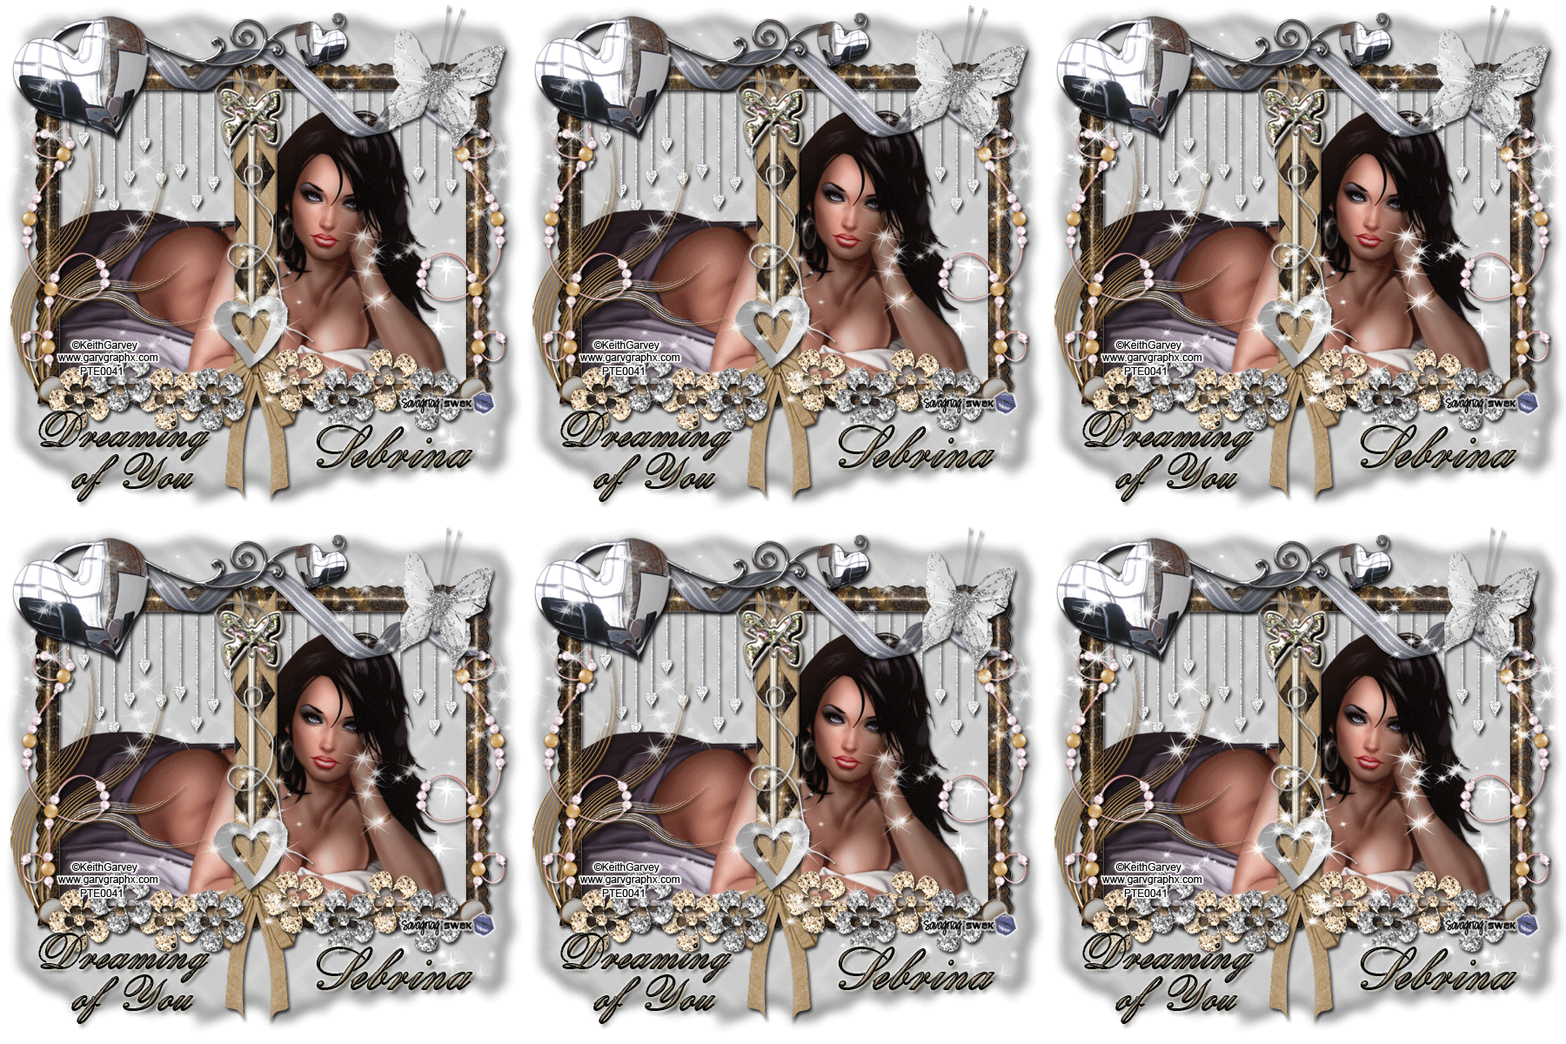
SUPPLIES NEEDED
TUBE OF CHOICE: I used the fantastic artwork of
Keith Garvey.
You must have a license to use this art.
You can find this art and get your license HERE.
SCRAPKIT: Grey World by Dazzlin Divas Designs.
You can find it at Whimsical Divas HERE.
FONT OF CHOICE: I used BankScrD.
I used Photoshop for this tut.
♥♥♥♥♥♥♥
In this tut we'll make the butterfly look like its flying,
make play with sparklies.
If you don't wish to animate, just skip the steps marked *BLUE*
Use my tag as a guide for placement of elements.
Open a canvas 700x700 pixels.
Flood fill with the color of your choice.
Open Paper4.
Resize to 90%.
Center on canvas.
Open Frame.
Place slightly toward top of canvas.
Open HeartCurtain.
Resize to 45%.
Duplicate this layer.
With this layer highlighted,
Right click in the Layer Palette.
When the pop up menu appears,
Click Merge Down.
Place and center behind frame.
Now go to Filter in your tool bar.
In the drop down menu,
Find Sharpen.
Click Sharpen Edges.
Duplicate this layer.
Highlight the first layer.
Go to Filter in your tool bar.
Click Noise.
Click Add Noise.
Set Amount to 15%
Check the Monochromatic box.
Hit OK.
For the second layer,
Repeat Noise steps.
Set Amount to 20%.
Check the Monochromatic box.
Open your tube.
Place behind Frame layer
but on top of HeartCurtain layer.
Position where you like.
I flipped mine Horizontally.
These are the elements I used:
Pin, resize to 35%
Flower, resixe to 35%
Duplicate this layer 3 times.
Flower1, resize to 35%
Duplicate this layer 3 times.
Place Flower & Flower1 layers across bottom of Frame.
String, resize to 50%
HeartString, resize to 35%
Rotate this layer 90 degrees Clockwise (90CW)
Ribbon, resize to 25%
Flip this layer Vertically.
Chrome, resize to 50%
Butterfly3, resize to 15%
Duplicate this layer.
Resize width on duplicated layer to 80%.
Leave height at 100%.
Open Sparkles2.
Resize to 75%
Duplicate this layer.
Flip the second layer Vertically.
If you are animating,
Duplicate both layers.
Highlight Paper4 layer.
Grab a soft edged eraser.
Erase around edges.
Place a drop shadow on all your layers except
all the Sparkles2 layers.
Resize the siggy to your liking.
Make a new layer.
Type your name on the taggie.
I used color b0946d.
Stroke, Center, 2, Black
I also used:
Drop Shadow
Bevel & Emboss

Outer Glow (color ffffbe)

Make two new layers.
On one layer type “Dream”
On the other layer type “of You”
Use the same text effects you used for your name.
MOST IMPORTANT!!
You must now do this:
Put the artist's name, website, and your license number
of the tube you used on the siggy!!
Add your name (ie: Designed by Your Name) behind this info.
Make sure this info is legible and clearly seen.
If you don't want to animate, Save as PNG.
YOU'RE DONE!!
(If you want to maintain your layers
Always Save as PSD first.
Then you can save it as a PNG.
**TO ANIMATE**
In the Layer Palette,
Hide the second layers of:
HeartCurtain
Butterfly3
Sparkles2 layers
Open the Animation Window.
Set the time for .1
Show all visible layers in the first frame.
Click the square button, next to the trash can,
in the animation window.
This will duplicate the first animation frame.
Hit this square 4 more times.
You now have 6 frames of animation.
Highlight the second animation frame.
Go over to your Layer Palette.
Leave everything as is except:
Hide the first HeartCurtain layer.
Unhid the second HeartCurtain layer.
Now go back to your animation window.
Highlight frame 3.
In the Layer Palette,
Hide the second HeartCurtain layer.
Unhide the first layer.
Also unhide the second Sparkles2 layers.
All four layers of Sparkles2 should show.
Go back to the animation window.
Highlight the fourth frame.
In the Layer Palette,
Hide the first HeartCurtain layer.
Unhide the second one.
Hide the first Butterfly3 layer.
Unhide the second Butterfly3 layer.
Hide the second layers of Sparkles2 layers.
Now only the first Sparkles2 layers should show.
Highlight frame 5 in your animation window.
In the Layer Palette,
Leave everything as is except
Hide the second HeartCurtain layer.
Unhide the first layer.
Highlight frame 6 in the animation frame.
In your Layer Palette,
Unhide the second HeartCurtain layer.
Hide the first one.
Unhide the Sparkles2 layers.
All Sparkles2 layers should now show.
Click Play.
If you like what you see...
Save as PSD. Then Save for Web & Devises.
YOU'RE DONE!
I hope you had fun with this tut
and that you can use the different techniques
in other taggies you create!
HUGS!
*This tut was created by me, Redneck Tuts by Savage.
Any resemblance to any other is purely coincidental.*
Artist: ©Keith Garvey www.garvgraphx.com PTE0041
Subscribe to:
Posts
(Atom)
About Me
- Savage
- Hi Ya'll! I'm Savage and I'd like to welcome you to Redneck Tuts. These are not your ordinary tuts, as they are geared toward those of us that don't have "working knowledge" of Photoshop or PSP. My tuts are all done in PS. They are designed to show you different techniques that you may not know. I hope you learn something that you can use in your creations in the future. Please, just have fun and put your own spin on these tuts. Be original and shine! Love Ya! ♥


