


♥ Follow Me ♥

♥Free Fonts♥


Wednesday, September 14, 2011
SUPPLIES NEEDED
TUBE OF CHOICE: I used the fantastic artwork of
Keith Garvey.
You must have a license to use this art.
You can find this art and get your license HERE.
SCRAPKIT: Haunted Times by Jenny's Designz.
This is a FTU kit.
You can find it HERE.
FONT OF CHOICE: I used Vivaldi.
I used Photoshop for this tut.
♥♥♥♥♥♥♥
In this tut we'll make a ghost move and fade out.
If you don't wish to animate, just skip the steps marked *BLUE*
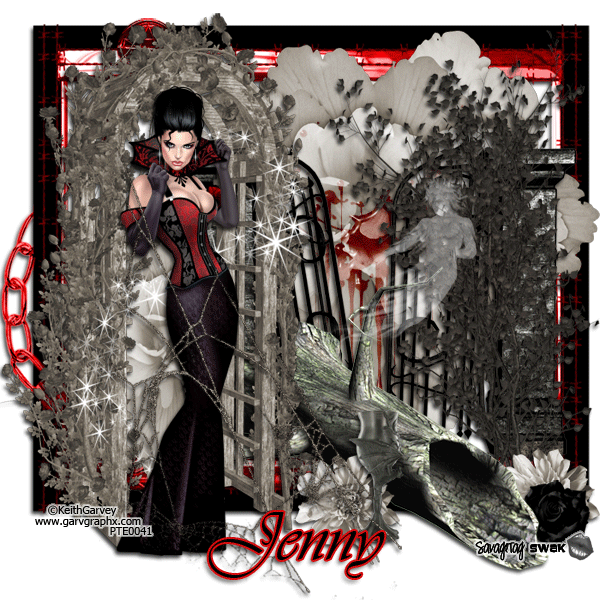
Use my tag as a guide for placement of elements.
Open a canvas 700x700 pixels.
Flood fill with the color of your choice.
Open frame1.
Resize to 85%.
Center on canvas.
Open flower2.
Resize to 65%.
Duplicate this layer.
Resize to 65% again.
Place the bigger flower2
over toward the right of your tag.
Place the smaller one over to the left.
Open blood.
Place on the bigger flower2 element.
Go up to the upper left corner of your Layer Palette.
Click the drop down arrow next to the word Normal.
Click on Overlay.
Leave Opacity set at 100%.
I used these elements:
gate, resize to 75%
vine, resize to 75%
flower3, resize to 50%
Duplicate this layer.
Move the duplicated layer in bottom center of tag.
rose1, resize to 35%
log1
archway, resize to 15%
fence
stars, resize to 75%
goblet, resize to 35%
torn web
ghost, resize to 25%
Open your tube.
Place behind the torn web layer.
Highlight torn web layer.
Erase any part of the web that covers
your tubes face.
Place a drop shadow on all layers except:
flower2
blood
stars
ghost
Resize your siggy to your liking.
Make a new layer.
Type your name.
I used Black.
Stroke: Outside, 2, color d60d0d.
Apply a drop shadow.
MOST IMPORTANT!!
You must now do this:
Put the artist's name, website, and your license number
of the tube you used on the siggy!!
Add your name (ie: Designed by Your Name) behind this info.
Make sure this info is legible and clearly seen.
If you don't want to animate, Save as PNG.
YOU'RE DONE!!
(If you want to maintain your layers
Always Save as PSD first.
Then you can save it as a PNG.
When doing both these steps
It is important to change the title of the tag.
Example:
When I Save as PSD,
I always name the tag what I want.
Then, when saving as a PNG,
I add the number 1 behind the name of the tag.
Like this:
Pet Ghost, Save as PSD
Pet Ghost1, Save as PNG
Otherwise, your PNG will overwrite your PSD
Merging your tag into one layer only.)
*FOR ANIMATION*
Ok. Let's play with the ghost.
In your Layer Palette,
Highlight your ghost layer.
Duplicate this layer 8 times.
I labeled my layers
ghost1, ghost2, ghost3, etc...
So you'll end up with nine layers of ghosts.
Hide all layers except ghost8.
We're gonna start with ghost8.
Highlight ghost8 layer.
Reduce its size to 90%.
Don't move him, just resize him.
Hide ghost8 and unhide ghost7.
Highlight ghost7 layer.
Resize this to 80%.
Hide ghost7, unhide ghost6.
Highlight ghost6.
Resize to 70%.
Continue to hide all layers
except the one you are working on.
ghost5, resize to 60%
ghost4, resize to 50%
ghost3, resize to 40%
With ghost3 highlighted,
go to the upper right corner of your Layer Palette.
Set the Opacity to 85%.
ghost2, resize to 30%
Set Opacity to 75%.
ghost1, resize to 20%
Set Opacity to 50%.
Now we're ready to animate.
**TO ANIMATE**
Open your animation window.
All layers of your taggie should show
except your ghost layers.
We will make these visible one by one
as we animate.
Set the time for .2.
Show ghost1 in the first animation frame.
Click the square button, next to the trash can,
in the animation window.
This will duplicate the first animation frame.
You will now have frames 1 & 2.
Make a total of 9 animation frames.
In animation frame 2, show ghost2.
Frame 3: ghost3
Frame 4: ghost4.
Follow this pattern until all the ghosts
are in their own animation frame,
ending with ghost9 in frame9.
Duplicate frame 9.
Now you have ten frames.
Highlight frame 10.
Now go over to your Layer Palette.
Highlight your ghost layer there.
On the canvas,
Move the ghost up and over a little.
Wherever you place him
is where he will stop moving.
Go back to your animation window.
Highlight frame 9.
See that icon that looks like a slanted row of squares?
Place your cursor over it.
It will say: Tweens Animation Frames.
Click it.
A new window pops up.
Use these settings:

Click OK.
You should now have 16 frames of animation.
Go ahead and click Play
to see your ghost go from small to big
and float.
Ok.
Now back to animating the rest of the siggy.
Highlight frame 16.
Duplicate this frame 8 times.
You now have 24 frames of animation.
Highlight frame 17.
Set the time for frames 17-24 to .1
Go over to the Layer Palette.
Set Opacity for ghost layer to 90%.
Highlight frame 18 in the animation window.
Go back to the Layer Palette.
Set Opacity to 80% on the ghost layer.
Back to the animation window.
Highlight frame 19.
In the Layer Palette,
Set the Opacity to 70% for the ghost layer.
Keep doing this
for the rest of the frames.
Lower the Opacity in each frame by 10%
until you get to 20% in Frame 24.
Make one more frame.
Frame 25, set time to 1.0.
Hide the ghost layer.
Click Play.
If you like what you see...
Save as PSD. Then Save for Web & Devises.
YOU'RE DONE!
I hope you had fun with this tut
and that you can use these techniques
in other taggies you create!
HUGS!
*This tut was created by me, Redneck Tuts by Savage.
Any resemblance to any other is purely coincidental.*
Artist: ©Keith Garvey www.garvgraphx.com PTE0041
Subscribe to:
Post Comments
(Atom)
About Me

- Savage
- Hi Ya'll! I'm Savage and I'd like to welcome you to Redneck Tuts. These are not your ordinary tuts, as they are geared toward those of us that don't have "working knowledge" of Photoshop or PSP. My tuts are all done in PS. They are designed to show you different techniques that you may not know. I hope you learn something that you can use in your creations in the future. Please, just have fun and put your own spin on these tuts. Be original and shine! Love Ya! ♥


I LOVE IT GF!!! :)
ReplyDeletethats a pretty awesome tag and tutorial! :)
ReplyDelete